
Welcome to Part 3 of this rendering tutorial.
>>> Click here to go back to Part 1
>>> Click here to go back to Part 2
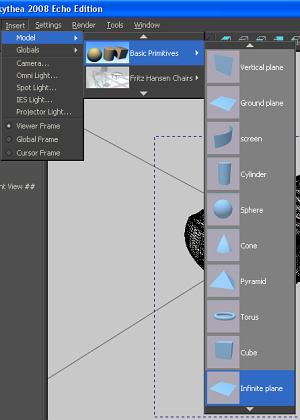
Typically for Product Rendering, I will insert an infinite plane into the scene. To do that, go to Insert >> Model >> Basic Primitives >> Infinite Plane ( as shown below).
Now, we will need to insert a Global Studio into the environment. In my opinion, Global Studios can significantly enhance the appeal and realism of the final rendering. The official repository on the Kerkythea main site contains libraries for CD skies as well as HDR probes. To insert Global studio settings, go to Insert >> Globals and select your preferred choice. Kerkythea may take a few seconds to load the settings into the environment.
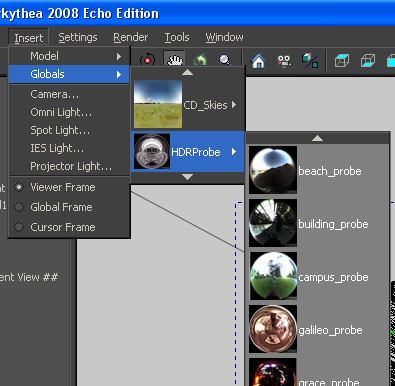
Please note that in order for CD skies and HDR probes to have an impact on the final rendering, Global Illumination must be used. This will be described later.
Inserting Light Objects
When CD skies or HDR probes is used together with Global Illumination, Light Objects are optional. However, additional lights can help brighten areas that are too dark.
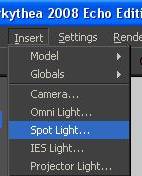
To insert a Light Object such as spotlight, go to Insert in the main menu bar, similar to the way the Global Studios are inserted.
To manipulate the light, select it using the My Scene browser as shown below.
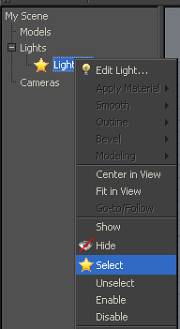
The controls for the light will be displayed. Use the manipulator to move, rotate and/or transform the light. For spotlight, you can use the slider bar to edit the cone angles.
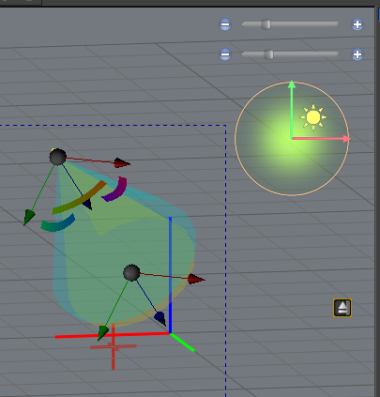
To edit Light intensity and shadow options, right-mouse-click on the light object (that is being displayed on the My Scene Browser) to go to Edit Light. For good effect, activate Soft Shadow.
That’s the end of Part 3 of Kerkythea basic rendering article.