This is Part 2 of Bringing Sculptris Model into Blender 2.5.
>>> Click here to go back to Part 1.
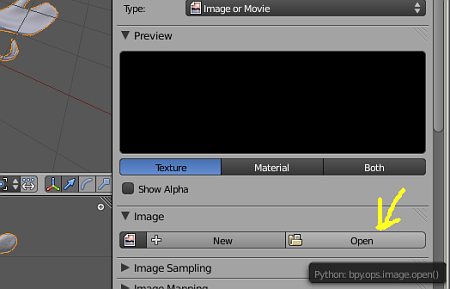
Now, we need to point to the location of the texture map that was created and exported from Sculptris. Click the ‘Open’ button to locate and load the texture. This is as shown below.

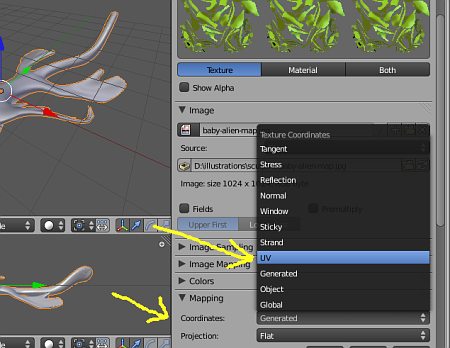
Now, the texture should be loaded. Next, we need to tell Blender the coordinate type of the texture. Under Mapping >>> Coordinates, select ‘UV’. This is as shown below.

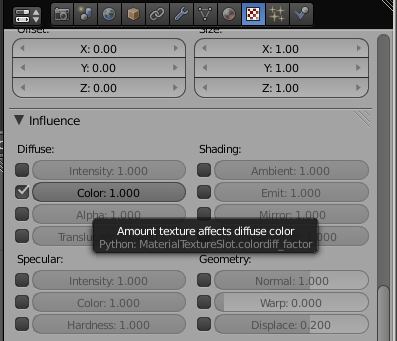
Besides indicating the mapping coordinates, we also need to indicate to Blender what influence the map is to be used for. Since the map is a colour map, under ‘Influence’, check ‘Colour’. You can also use the map for more than one type of influences. For bump maps, click ‘Normal’.

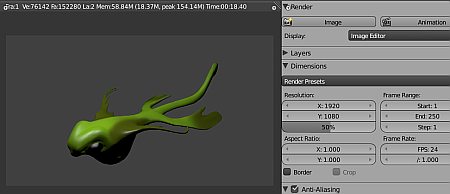
If you render the scene now, the model should have texture now.

Thanks for reading the tutorial. Drop me a comment if you have any queries 🙂

The textures load but the paint or colour is missing?
Hi I got it right. Saved the textmap under advanced tools in sculptris, previously I loaded the original texture from sculptris -obviously I’m a newbie to this and have no formal training, so thanks for the tutorial.
I don’t have Mapping or Influence menus. Where could they be hiding? :c
Did you click the arrow beside the Influence label?
Thank you! I did not know how to export the texture map, i did not see the advanced tools menu.
I don’t have the Mapping tab either… other than that thanks for the tutorial.
i need to open up the mapping tab… where is it? i really hope the admin is here because he is the only one with this tutorial…. please help me find it. what is an influence label?
I dont have uv on my texture coordinates…help?
Wow – I spent the last couple of days combing through long winded video tutorials and blogs, forums, etc. then found your simple and concise and easy to follow tutorial. You just saved me a gazillion hours of head banging 🙂 Thank you!
I have two versions of Blender — the older version 2.49 doesn’t have the same UI as the 2.5 versions and up which is what this tutorial is using. I just loaded in 2.6 and the UI is pretty much the same as 2.5.
What I found out is once you’ve uploaded your obj file into Blender, either before or after you click on the texture icon, you need to right click on your object so it’s officially “selected” in order for all the texture options to become available. Then you will see the mapping and influence tabs. It took me about 30 minutes to figure this out. Hope that helps. 🙂
woah, cool! * A * and now I can animate this sculptris object with blender?
A nice and very clear tutorial.
Did everything just like recommended, didn’t work. Couldn’t find a reason why. But this often happens with me and Blender, anyway… What works with others, doesn’t work when I try it.
If you are missing mapping/coordinates or influence you can download this version (blender-2.5-alpha1-win64.zip) from http://download.blender.org/release/Blender2.50alpha/ and they will be there :]
How do I do this in the Cycles Render, it’s different.
how do I texture organic skin?