
This tutorial requires you to have a basic knowledge of Blender 3D. If you are new to it, click here for basic introductory resources.
For much of my design projects, I need a good renderer to render the 3D product models that I have created using Rhino3D.
Blender 3D has been a reliable rendering program for many of these industrial design and 3D projects.
To learn how to bring Rhino-created 3D models into Blender 3D, click here.
If you are already familiar with the file importing process, below are some pointers for creating more realistic renderings using Blender 3D as a Rendering Program.
1. Use environmental mapping and raytracing
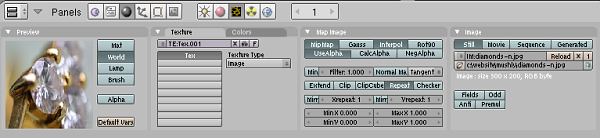
Environment mapping gives complexity to reflections, thus creating a more realistic image. Unless the scene has lots of elements and objects, an image map for the World Texture is one of the best way to create nice complex reflections on surfaces of objects. To load an image into the world environment, go to the Texture Panel. Next select World. Under Texture Type, select Image. Load the image from the file browser. See the screen shot below.
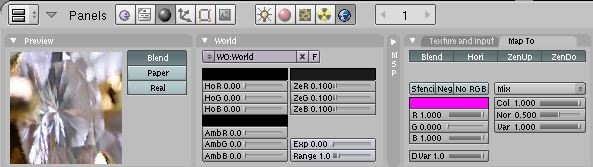
Once the image map is loaded, go to the World Panel. Make sure that in the Map To section, Blend, Hori, ZenUp and ZenDo are all selected. This will enable the image map to appear in the world environment. See the screen shot below.
One thing to note is that Blender can accept *Hdr files as environmental map. HDR is a high dynamic range file and can produce rendered results that are significantly more realistic than low dynamic range formats such as Jpeg. HDR can be used with Blender’s internal renderer. >>> Click here to see an example of a HDR rendered artwork using Blender’s Internal Renderer.
2. Use Area Light
Area Lights give a much more pretty image than typical spot or unidirectional light. The important point is too scale the size of the area light until the most appropriate shadow diffusion is achieve.
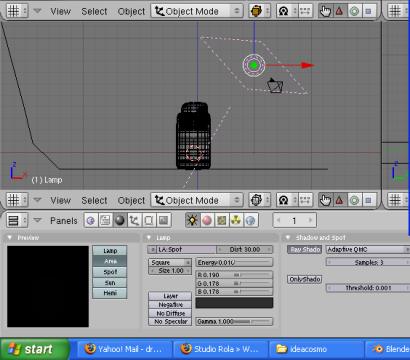
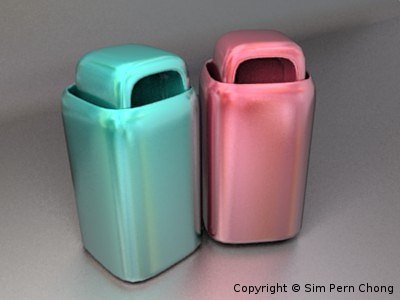
When using the area light, an important point to take note is to use the correct sample value. Typically a sample value of 5 is good enough. Too high a sample value creates an unnecessarily slow render. The rendering shown below is created using:
1) one area-light in the scene only and
2) method 1 which is an environmental map made from applying an image map to the World environment.
3. Use Ambient Occlusion.
Ambient Occlusion can create very nice diffusion around the edges of objects. It can be used to replace the area light. However, rendering using the Ambient Occlusion is significant slower. Below is a screen shot of the Ambient Occlusion setting.
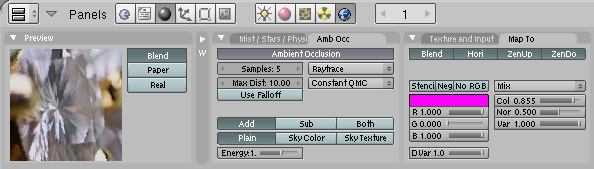
Personally, I find that experimenting with Add and Both give different contrast results. If time permits, it is good to try out both settings to see which one products the more desirable outcome.
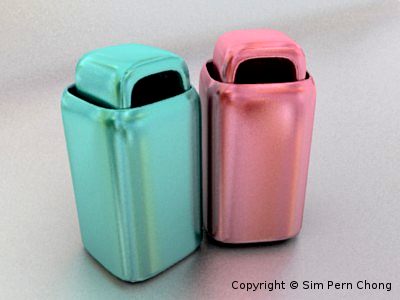
Below is a rendering using:
1) Ambient Occlusion and
2) environmental map made from applying an image map to the World environment.
No light is used in the scene below. The lighting is solely from the environment and ambient occlusion. The image’s brightness/contrast was edited using GIMP.
Well, these are some of the rendering pointers. Hope that the article is useful.
Happy rendering 🙂
One thought on “Product Rendering using Blender 3D”
Comments are closed.