
This is Part 2 of ‘Glow effect’ Blender tutorial, which can be used for rendering more realistic Product and Industrial Design concept images.
Click here to go back to Part 1.
In Part 1, we have seen the screenshot of the entire compositing node configuration. Here we will describe them in parts.
Basically, the overall process involves creating a new ‘soft & glowy’ layer and combining it to the original rendering. This newly created layer will need to have the bright areas (such as the phone screen and the blue rim) intensified and brightened, while the rest of the areas darkened. When composited with the original rendering, this will cause the bright areas to give a glow.
To create this new ‘glowy’ layer, one will firstly need to create an alpha layer that will then be recombined with the original rendering. It goes like this …
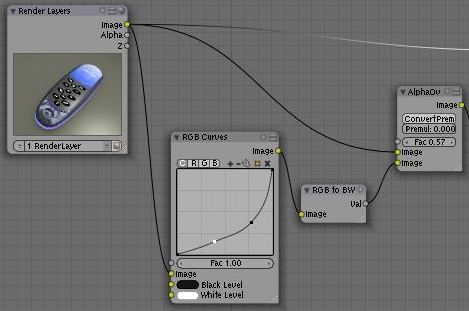
Firstly, create a Color>> RGB curves node. Next, add a Converter>> RGB to BW node. Modify the curve of RGB curves node until the bright areas are intensified while the dark areas are darkened further.
Next, add a Color>> Alpha Over node. Link the image output socket of Render Layers to the top input socket of Alpha Over node. Link the output socket of RGB to BW node to the lower image input socket of Alpha Over node. This is shown in the screen capture below.
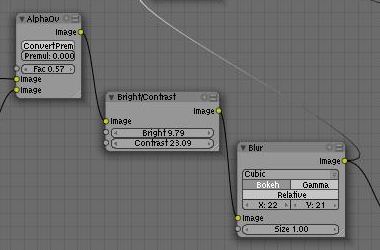
Next, insert a Color >> Bright/contrast node and Filter >> Blur node. Link them up as shown below. You may increase the Brightness and contrast using the Bright/contrast node. Depending on the image size and the desired effect, give non-zero values to X and Y of the Blur node. Use Bokeh.
This is the end of Part 2 of this Blender Product rendering tutorial.