
This is Part 3 of the Blender 3D Glow effect tutorial.
Click here to go back to Part 1
Click here to go back to Part 2
In the previous parts, we have created the new layer. Now, to combine the 2 layers, we will need a Color>> Mix node. The mode of this composite node is set to Lighten. Link the output socket of the Mix node to the image input socket of Composite.
Next, link the output image socket of the Render Layer to the top image input socket of the Mix node. Now, link the output image socket of the Blur node to the lower image input socket of the Mix node. The configuration is as shown below.
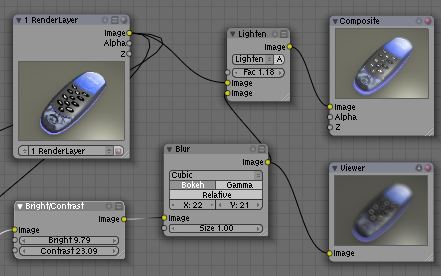
To control the degree of glow, experiment with the Fac value of the Mix node. Typically, a higher value will create a correspondingly brighter glow.
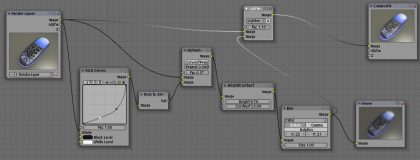
The full configuration is as shown below. Click on the screenshot below to see the enlarged version of it.
When rendering, please remember to activate Do Composite (in the Scene Panel) in order for the glowy effect to be processed as well.
We have come to the end of the Blender Glow tutorial. Hope that it has been useful.