
This is Part 3 of the Building organic button using Rhino 3D tutorial.
Click here to go back to Part 1.
Click here to go back to Part 2.
In Part 2, we have already inserted a new knot on the 3rd profile curve.
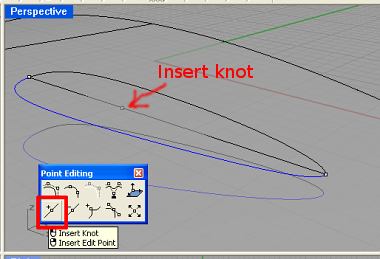
Next, we need to form the shape of this curve. To do that, firstly select the curve. Next, go to Pointing Editing >> Control Points On. This will turn on the CVs.
Pull the CVs until you have achieved the desired shape for this curve. The Planar should be turn on. This will prevent the cursor from snapping back to the reference plane.
For a clearer understanding, see the screenshot below.

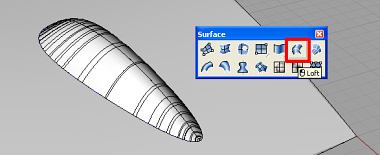
We are almost done now. Using Surface >> Loft, create the skin of the button using the 2 COS (Curves-on-surface) and the 3rd Profile Curve. You show get a surface as shown below.
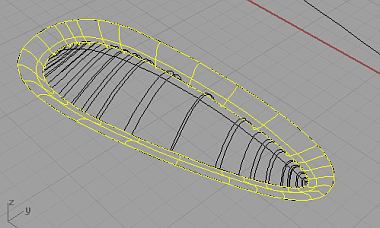
That’s it! We have create the organically-shaped button using Rhino 3D. Although, this tutorial is written for Rhinoceros 3D, it is really applicable to other CAID surface modellers as well.
You may wish to proceed further by creating an offsetted allowance on the main body surface that is around the border of the button.
That’s all for this 3D surface modeling tutorial. Thank you for reading. 🙂
To purchase Rhinoceros Surfacing Techniques Book via Amazon, click on book cover image below.

Note: The above video tutorial is not included in the book.