
This is Part 2 of Rhino 3D building organic button tutorial.
Click here to go back to Part 1.
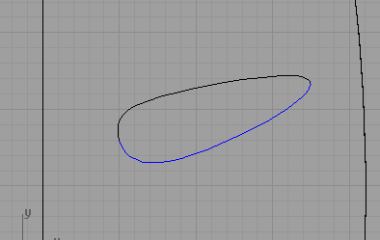
For Part 1, we have already created the first 2 curves and correctly positioned them as shown below.
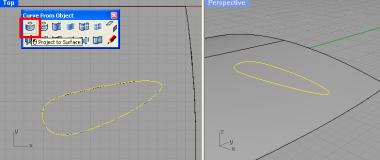
Now, using the Project to Surface command, project the 2 curves onto the surface. Make sure that you are projecting from the correct view.
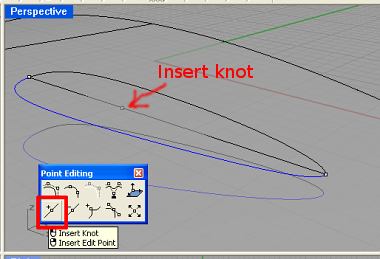
Next, using Interpolation Point Curve, create the middle profile curve as shown below. It is important to use the Osnap (End) to snap to the endpoints of the Curves-on-surface. See screen shot illustration below for a better understanding.

Next, we need to insert a knot on the newly create curve. To do that, go to Pointing Editing >> Insert Knot.
We have come to the end of Part 2 of this Rhino 3D tutorial.