
This tutorial is skewed towards CAID or Computer Aided Industrial Design, which is of significance to CAD Modellers and Industrial Designers.
This Rhino 3D tutorial is not mean to be a detailed instruction on modeling a complete product. Instead, it is intended mainly for outlining the basic process and framework for creating free-form objects or products that are symmetrical in form. This tutorial is compatible will all versions of Rhino, including version 1. However, with version 1, the surface evaluation tools will be unavailable.
Note: If you need more advanced NURBS modelling training, do consider our Advanced Rhino 3D Modelling Course.
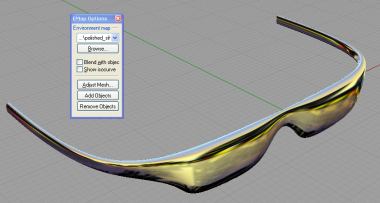
For this tutorial, we will illustrate the process via the construction of a very basic Spectacle-like structure.
Let’s start.
Firstly, we will need to build the basic outline of one half of the spectacle. We are going to use the Curve from 2 Views command. The Alias StudioTools equivalent for this command is Combine Curve.
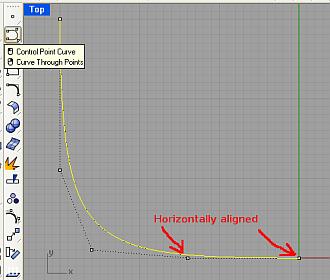
In the Top View of the Rhino 4-View screen, draw the top profile of the spectacle (as shown below). To maintain eventual tangency, the CV where the symmetry will be, and the CV next to it must be horizontally align to each other.
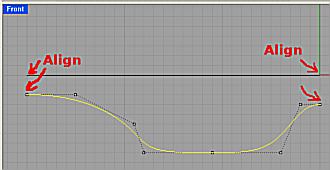
Next, in the Front View, create the curve that represents the Front Profile of that half of the spectacle. The curve is as shown below. It is important to ensure that the ends of the front profile curve are vertically aligned to the ends of the top profile curve.
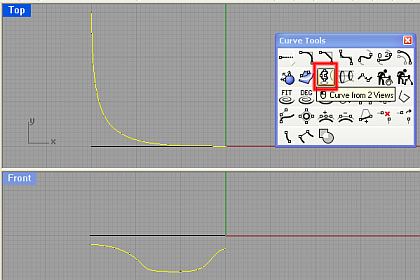
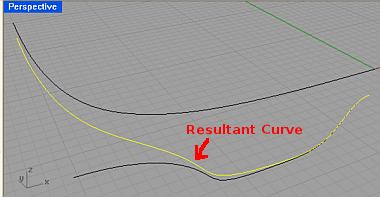
Now, go to Curve Tools >>> Curve from 2 Views. Select that Top Profile Curve from the Top View & the Front Profile Curve from the Front View. Selecting the correct curve from each view is crucial.
This will create the resultant curve which is one of the edge of the product. The resultant curve should be as shown below. At this point, some people may prefer to rebuild the curve to reduce number of CVs. However, when doing so, it must be ensured that the shape of the curve is maintained even after rebuilding.
This is the end of Part 1 of this Rhino 3D product modeling tutorial.
Hi,
The tutorial was very nice.
I too write tutorials to help 3d community.
You can find at http://product3d.blogspot.com
regds
Raj