
This is a Yafray – Blender 3D tutorial. To understand this tutorial, we need to have a basic knowledge of Blender 3D. If you are new to Blender 3D, click here for basic introductory resources on the software.
In Photography, the depth of field (DOF) is the part of a photograph that appears in focus.
Typically, 3D digital raytraced rendering have all parts within a scene staying in focus. This can at times appear unrealistic. Applying Depth of Field (DOF) help infuse an added touch of realism to rendered images.
For Yafray, we can specify parameters that create a DOF such that only a certain portion of the rendering remain sharp.
To create a DOF, we need to modify the value of the Camera’s Aperture within Blender 3D.
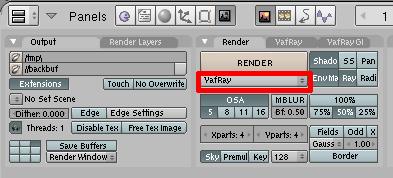
Firstly, make sure that Yafray is already being selected as the Render Engine. To do that select Yafray under the big Render button. See picture below.
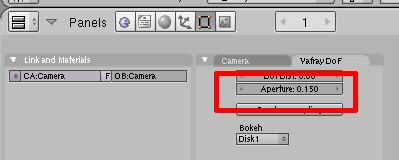
With the Camera selected, go to Editing Panel >> Yafray DoF. Now, give an Aperture value greater than zero. Typically, an aperture value between 0.1 – 0.5 is good enough. See screen shot below.
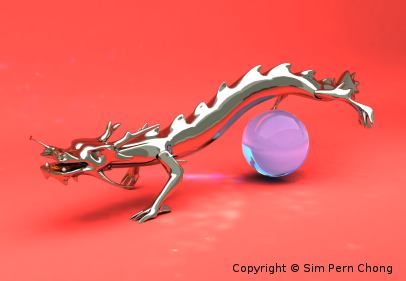
The image below shows a rendering without enabling Yafray DoF. That is, the camera parameters remained as default.
The image below shows Yafray DoF enabled. That is, the Aperture value is > 0. As you can see, the head of the dragon stayed in focus, while the rest of the portions got progressively diffused.
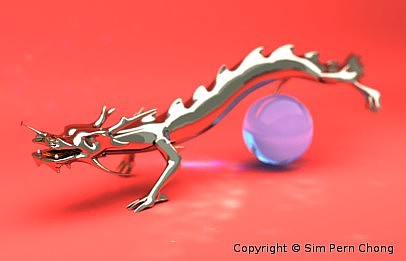
Practically-speaking, we can use DOF to direct attention to the part of the rendering that requires the most attention. For Product Rendering, we can keep the product in focus, while allowing the background to be diffused.
Well, that is all for the tips on creating Depth of Field (DOF). Hope that it has been useful 🙂