
This is an Alias Studio article about setting a chrome shader. It is a very basic tutorial for making chrome material shader within Autodesk Studio or Alias StudioTools.
Firstly, we need to create something for the chrome material to reflect. Typically, I will create a sky-like environment. Let’s go over to the Multi-lister.
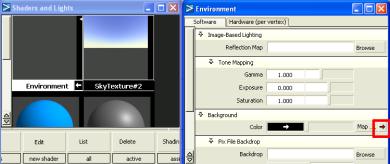
We need to edit the Environment by double clicking on the preview or go to Edit >> Edit. When the Environment Optional Panel is opened, click on the arrow next to Map of the Background section. See screen shot below.
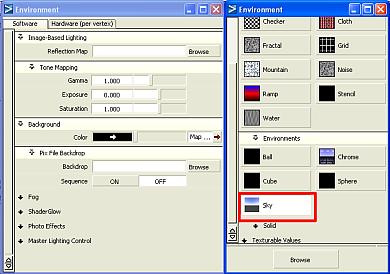
Next, select Sky from the Environment >> Environments. See screen capture below.
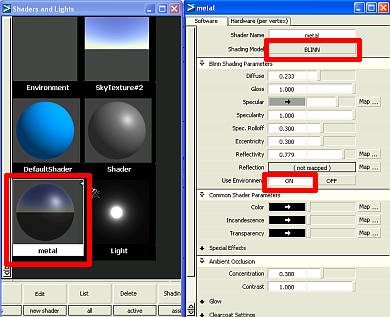
Next, we need to create the material shader for the chrome object. For the shading model, I use Blinn shader. Use environment must be turn ON in order for the environment to be reflected on the material. Remember to click assign shader. The setting is as below.
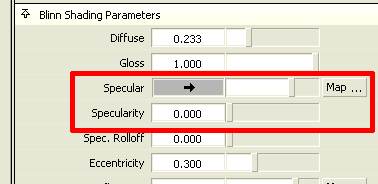
One important note is that there should be a high Specular value assigned. The Specularity value can be kept to zero or low, but there must be substantial Specular value. See the screen capture below:
When rendering, remember to use Raytracer. The rendered chrome should look something like what are being shown below. The image on the right has Specularity = 0:
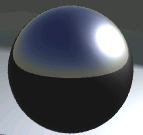
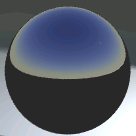
Specularity>0 Specularity=0
That’s all for this basic chrome material setting. To get the look that most matched your intent, you may need to play with and tweak other parameters such as Reflectivity and Colour.
Thanks for reading 🙂