The interface of Blender for version 2.5 and onward is significantly different from the older versions (2.4x) . Some of the ways of doing things in the 2.4Xs no longer works with this new version. One of these is symmetry modelling.
This tutorial will show one way of setting up symmetry modelling when using the newer version of Blender.
Note: If you need hands-on training for Basic modelling using Blender, do consider our very affordable Basic 3D Modelling Course. This course is conducted in Singapore only.
Generic steps for symmetry modelling:
1. Add a cube and move it to one side of the centre vertical grid line.
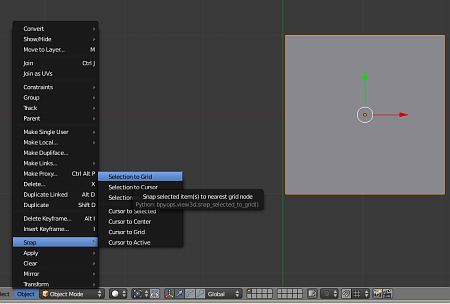
2. With the cube selected in Object Mode, go to Object >> Snap >> Selection to Grid. This is as shown below.

This will snap the cube edges accurately to the grid
3. Next, place the cursor along the centre vertical grid line.
4. Go to Object >> Snap>> Cursor to Grid. This will accurately snap the cursor to the center line. Refer to the screenshot below.

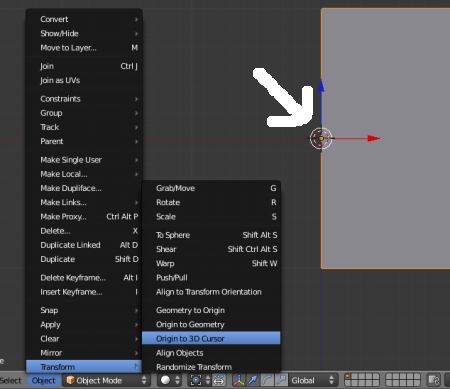
5. Now go to Transform >> Origin to 3D Cursor. This will move the Origin (Object center) to the cursor position. This is as shown below.

This is the end of part one of the Blender 2.5 symmetry modelling.
