
Rapid Prototyping (or 3D Printing) is a method for creating a physical prototype from your 3D digital CAD model. Generally, the model making role is entrusted to model makers, but designers may need to know how to prepare the files for prototyping.

The general file format for Rapid Prototyping is STL. Most modern CAD programs such as Rhinoceros and Solidworks can export as this format.
It should be noted that Rapid Prototyping (and 3D printing) systems and requirement are not always the same as mass-production requirements. Therefore a 3D model part that can be 3D Printed or Rapid prototyped does not necessarily mean that it can be mass-manufactured with the same dimension without alteration. For instance, some Rapid prototyping systems can overcome undercuts, even though undercuts and draft-angles are essential considerations for injection-moulded parts.
The following are some basic measures for preparing STL files for Rapid Prototyping from Computer Aided Industrial Design Software such as Rhinoceros 3D and Alias Studio.
If you prefer to watch a video instead, this video below is a concise workflow:
STEPS:
1. Models should be water tight. In Rhinoceros 3D, use Analyse >>Mass Properties >> Volume to check for water-tightness. A water-tight model will have volume.
2. In the past, the 3d models should be positioned in the positive quadrant of the 3D CAD’s coordinate system. However, this condition is not so crucial now with many modern programs. But it is still a good practice.
3. Surfaces of the model must have correct Normal Orientation. In Rhino3D, use Analyze > Analyze Direction to analyze and flip Normals where neccesary. Chances are, if the model is already a solid, the directions are already correct.
In Alias, use Object Edit > Reverse Direction to analyze and flip Normals where required.

4. Models need correct tessellation density. STL files is a mesh / polygonal file format. Therefore they cannot represent curved surfaces exactly. Increasing the number of triangles improves the approximation, but at the expense of bigger file size. Large, complicated files require more time to pre-process and build, so the designer must balance accuracy with manageability to produce a useful STL file. In Rhinoceros 3D, one can use the Mesh command to create a mesh to the desired polygonal density. When done, select the newly-created Mesh object for export as an STL file.
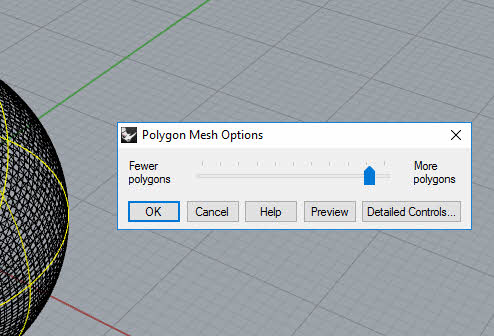
Below is a screenshot of meshing a Rhino 3D model using the Simple Controls.
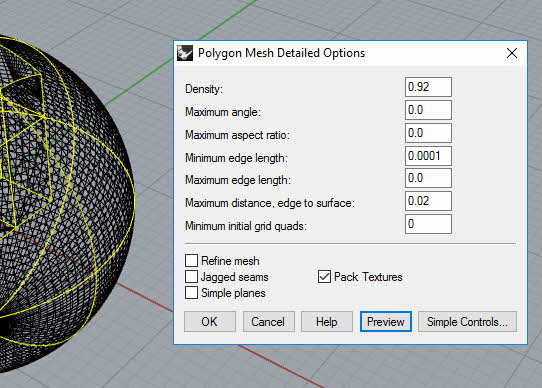
Below is a screenshot of meshing a Rhino 3D model using the Detailed Control.
Disclaimer: The article attempts to be as accurate as possible. However, Studiorola does not warrant that the content is entirely accurate, complete, reliable, current, error-free and/or appropriate for all situations. You assume full responsibility for all of the information contained within this article. We cannot be held liable in any way for results stemming from the practical use of this information.