
The following is a typical setup for Product Rendering that I often use. It is just a sharing and is thus not definitive. It is a common way for me to set up a digital scene for Ray traced rendering. For renderings using Global Illumination methods, the setup may differ from that of the illustration shown below.
The blue object in the illustration below is the product.
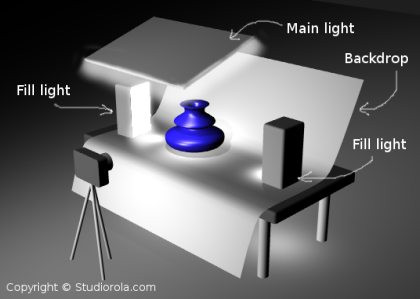
Similar to real Studio Photography, the lighting usually consists of a Main light and one or several Fill lights. The fill lights usually are of lesser brightness or intensity than the main light. The main purpose of the fill lights is to prevent parts of the product from being under exposed and creating overly-dark areas.
I often use an Area light as the Main light. In my opinion, Area lights produce nicer soft shadows that the other types of lights. To prevent unrealistic overlapping of shadows, I often deactivate shadow castings for the fill lights.
A backdrop is usually shaped as per the illustration. This will create a more pleasing graduation as the background. It also prevents the edge of the floor from appearing in the rendering.
As for the camera, I think it need not be squarely and directly in front. It could be at a slight angle to either the left or right. The camera view should be like the view from a real SLR camera.
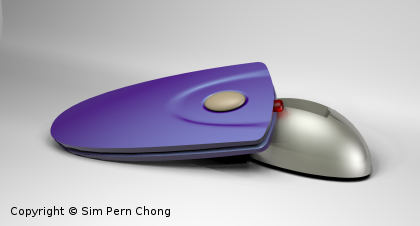
Below is an example of a rendering done using the above-mentioned settings. For this rendering, Flamingo renderer was used within the Rhino 3D environment.
As mentioned earlier, when using Global Illumination as the rendering method, the lighting setup can be quite different from this. Programs that use Global Illumination can assign objects (with emit values) as light emitters. Additionally, environmental maps (such as HDRs) also contribute to the amount of light in the scene.
That’s all for this article.
I am sure there are many more ways to set up a Product Rendering scene. Thank you for reading.
Hi, I followed your suggestions, but I can’t make the area light (main light) above project a light without creating strange lines on the backdrop and object I created. Is there a certain setting which has to be adjusted for the light in order for it to project correctly?
Thanks-
Hi DC,
Perhaps, you can set the upward curve of the backdrop further away from the lights. Also, keeping the specularity and hardness value of the backdrop at zero or low helps in reducing unwanted highlights.
regards
Thanks for the reply. It still hasn’t solved my issues sadly. Maybe its a problem of positioning the light. Does it matter how tilted it is compared to the ‘floor’ where the object is placed? and does the size of the light also matter? I’m having difficulty placing it also, as it seems to give light only where the X centre of the main light is over.
What is the backdrop material, please?