>>> Click here to go to Tutorial: Basic Introduction to Natron for Digital Compositing (Part 1)
>>> Click here to go to Tutorial: Basic Introduction to Natron for Digital Compositing (Part 2)
Once the node setup is complete, we can render the composition as an output.
Rendering final output to file
As mentioned, in order to render the final result to a file, a Write Node is required in the setup.
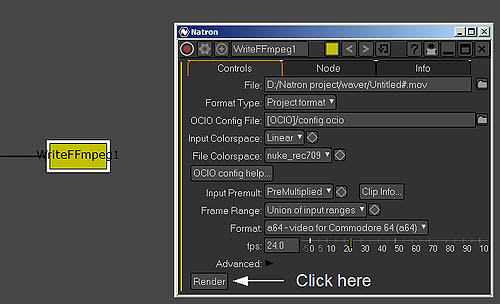
When it is time to do the render to file, click on the Render button corresponding to the Write Node. This is as indicated below.
This will render a file to be saved in the assigned location.


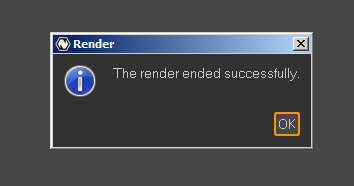
When the render is complete, the following message will appear.

Below is an animation that I have made using Blender and Natron. Please like it if you appreciate this tutorial. Thanks !! 🙂
That all for the short introduction to Natron. As mentioned, I am no expert in this area. Thus I am just contributing in the way that is within my understanding of this program. 🙂

Very good the tutorial, thank!
I want deep information greater about process nodes.
Where to find?
Thanks for the Interface introduction, i’ve learnt something while reading through your composition tuts, am now littlely in mind of how #Natron workflow connects
You are welcome 🙂
I first came to Natron in looking for alternatives to After Effects for the purpose of text animations which After Effects is considered a default, de facto application (albeit, expensive).
That being said, I think Natron has a lot of potential and promise. There are those who come to it from extensive experience, and those, like me, who, while I’ve worked with Blender, Animation Nodes and such, come at it from a great degree of inexperience.
The tutorial here, makes a point worth sharing relative to Natron:
Indierebel: Intro to Nodes
https://www.youtube.com/watch?v=HAmPYuddwPE
That, coming out of the Viewer Node are the arrows “A” and “B” and that “B” is for backgrounds: “A over B” is how he describes it.
Also, the Write node is important for rendering, but, never seems to get much explanation. I’ve downloaded Natron examples from tutorials that touch upon just about everything else BUT rendering. I’m spoiled by Blender tutorials, they almost always end with a render.
Sometimes it’s just not clear HOW Write should be properly used in order to render properly.
I know it’s got to attach to SOMETHING. People say, just click the “Render” button if nothing else works. Well, if it’s not properly connected, NOTHING happens.
Seems a whole tutorial could / should be dedicated to how to properly use the write node, (multiple examples, sample error messages (with solutions) since so much depends on it. Unless you just like admiring your work from the Viewer, which isn’t very productive.