
High precision organic 3D modelling of design styling details is the forte of Rhino 3D.
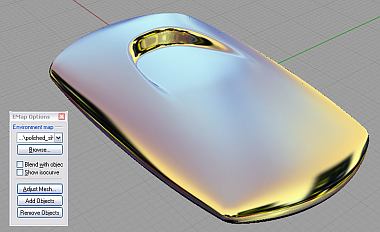
This is a Rhino 3D tutorial about making a styling detail as shown below. Basically, the styling detail is a nice, seamless depression.
Note: This video shown below is an update of this styling detail’s concept modelling using Rhino Version 6
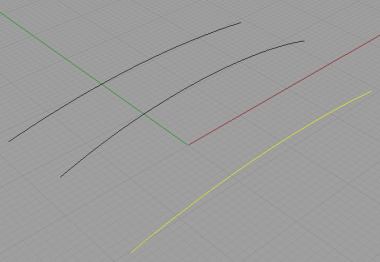
Firstly, we need to build the basis of the top surface. Create 3 curves as shown below.
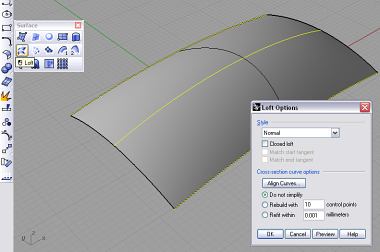
Using Loft, build the surface. The style of the Loft remain as Normal.
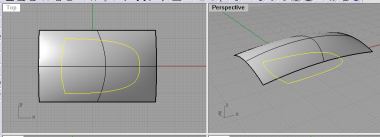
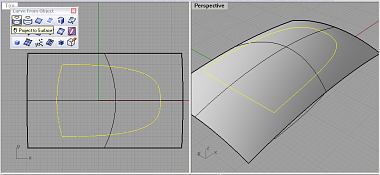
Next, in the Top view, create 2 curves as shown below. It is important to make sure that the ends of the curves meet. Use the Osnap >> End to achieve that.
Next, using Project to Surface project Curves-on-surfaces onto the surface. Make sure the projection was done on the correct view; in this case it is the Top View. See screen shot below. Note for newer versions of Rhino, Project-to-Surface is not required in order to perform a trim.
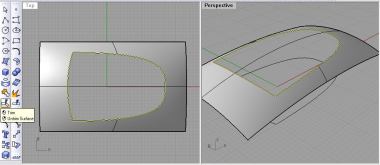
Now, using Trim, remove the portion of the surface as shown below. If you have difficulty trimming, you can use Split instead. If you are using Split, you will need to delete away the unwanted portion manually.
Well, this is the end of Part 1.