
Latest Update:
Please watch this video tutorial for shelling and other mechanical operations using Rhino 5 and higher. Please do subscribe to the Youtube channel if you like to have more information and knowledge pertaining to Rhino and CAD applications.
____________________________
As of this writing, Rhino3D (version 4) does not have default Shelling ability. According to the Rhino homepage, Version 5 of this popular 3D modelling program may include Shelling ability. This will be a most welcoming function.
In the meantime, to do shelling or building of wall thickness onto 3D models, we need to manually execute additional steps.
This is a basic tutorial on building wall thickness or shelling with Rhino3D.
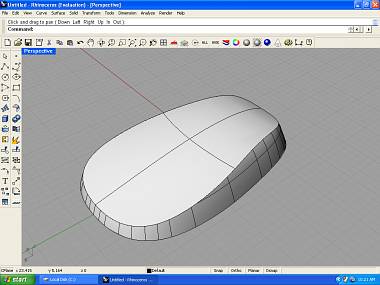
We will use the model shown below as an example.
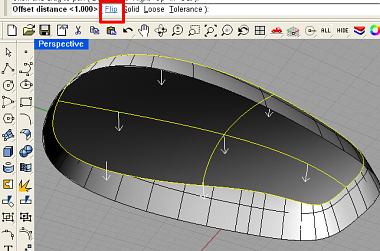
Firstly, use Offset Surface to create the inner walls of the 3D model. See the screenshot below:

Make sure that the surface is flipped to the correct direction. Where necessary, use the Flip function to toggle between the 2 directions.
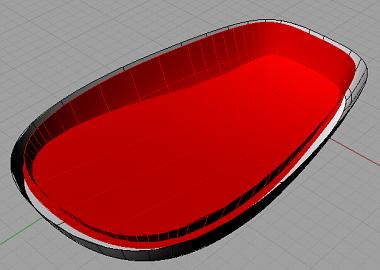
Do the same for all surfaces. As per Plastic Injection molding guideline, it is advisable to keep the wall thickness even throughout. This is to prevent unsightly variation in surface evenness.

You should get something like what is being shown below.
This is the end of Part 1 of the tutorial.
nicely done
Thanks for the comment.