
This tutorial is for people who want to use Blender 3D as the rendering platform for 3D models that were created in Rhino 3D or otherwise.
Note: Studiorola provides training for rendering CAD models using Blender and the Cycles Renderer. Click here for Product Rendering Course Using Blender & Cycles.
After the model has been created in Rhino, we will need to prepare the file for importation in Blender 3D.
Firstly, it is always a good practice to join surfaces that belonged to the same part of a model.

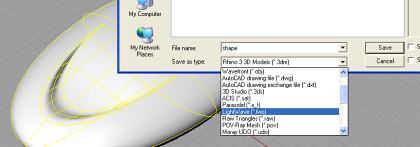
Once the surfaces have been joined, select the model to be exported. Go to Export Selected. Choose either 3D Studio(*3ds) or Lightwave (*lwo) as the export file format. See screenshot below.
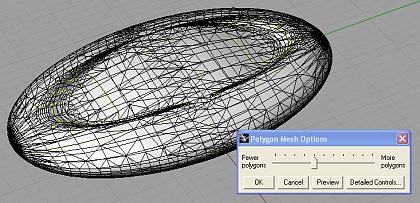
Next, the dialog box for Polygon Mesh Options will be displayed. Click on Preview to visually see the density of the mesh. Once a suitable density has been decided, click OK.
Now, we can import the exported 3dS or Lwo file into Blender.
In Blender 3D, go to File >> Import. Depending on the exported file format, choose 3D studio or Lightwave. See screen shot below.

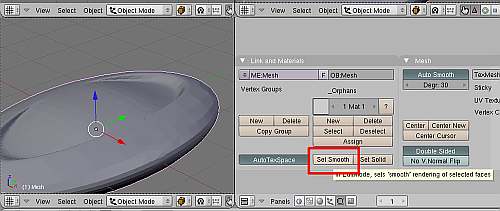
Once done, select the model and go to Editing Panel (F9). Click on Set Smooth. This will smoothed the polygons and prevent the faceted look. Screen shot below shows the smoothing process.
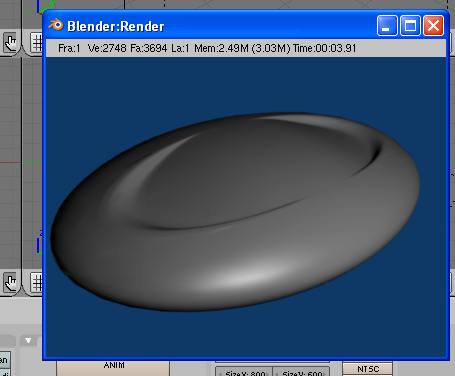
The model should appear smooth now as shown below.
That’s it. We have successful imported and prepared the Rhino file for Blender 3D.
We can now proceed with the other tasks such as material assignment and lighting.
That’s all for this tutorial. Thanks for reading. 🙂
Nice short manual…please give oss more concerning Blender and Rhino…Kind regards Hans
Hi Hans,
Thanks for the comments. 🙂
There are many other tutorials regarding OSS and industrial design on the tutorial section.
regards